
Why invest in an expensive store-bought worm farm when you can learn how to make a worm farm yourself? It’s basic stuff, but the long-term benefits and increased productivity of home, DIY farming are undeniable. Vermiculture, or worm farming as it is popularly known, is the art of breeding worms. Soil conditioned by this black gold is what keeps many gardens and farm operations from going under. It improves the structure of soil, increases yields, and enriches the quality of vegetables and fruits.
Considering the benefits of worm farming, every garden will see improvement from having one. Worms eat up to half their body weight of organic matter in a day. Meaning, a worm farm with 1000 worms can crunch through leftover food scraps of one family. You can learn how to make a worm farm in a tiny urban closet or a large ranch. You don’t need much of a handyman or any expensive materials to make a clean unit with high functionality.
Benefits of Worm Farming
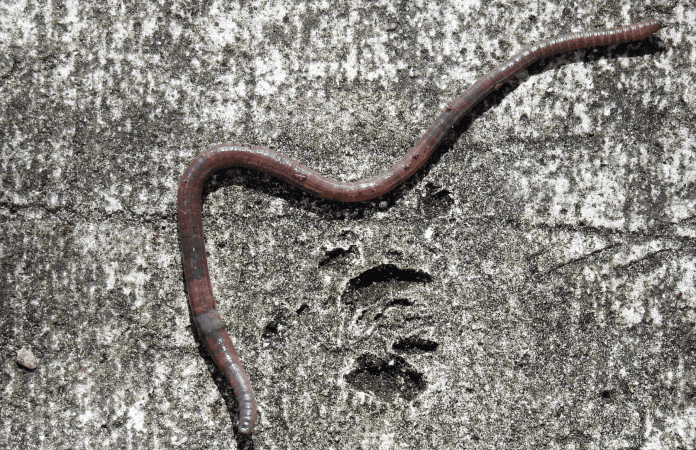
There are many benefits to learning how to make a worm farm. However, before you begin, you need to make sure that you have the right species for the job. Ideally, earthworms are every gardener’s best friend, as they will benefit your garden soil in many ways. Earthworms help build good soil quality as they tunnel and go through the soil. However, it’s not the aeration that is most important but the nitrogen, magnesium, calcium, and phosphates that they leave behind in the soil.
While they are tunneling around the soil, they are eating and processing the soil, leaving behind rich deposits of worm castings. These deposits improve garden soil making it maintain moisture over a long period. Earthworms also generate an endless supply of cheap compost that is beneficial to garden soil and plants. Unlike store bought compost, it’s eco-friendly, chemical-free and uses up a biodegradable matter that would have normally been trashed out.
Learning how to make your worm farm will eventually help suppress certain types of weeds and pathogens that could have developed if the compost were not present. Worm farming helps your garden plants develop better structure and root growth. It’s also an excellent medium when it comes to growing seedlings since it enhances germination and yields,
It’s important to note that the castings are processed soil deposits that have passed through your worms’ gut and out the other end. The benefit is, it’s enriched humus, making it ideal for plants and vegetables in your garden.
How to Make a Worm Farm
You are probably wondering how many worms you need to start your worm farm. Well, these little garden enhancers will multiply in no time. However, there are some considerations that you need to take into account, such as how much household garbage you can provide every day. Also, do you have an alternative form of food available if need be? After all, you don’t want your worms going hungry!
Which earthworms will make the best compost for my farm?
While there are a hundred different species of earthworms, there are four main categories of earthworms.
The garden worm

It’s a common large earthworm that you have probably already seen in your garden. They are common after rains and have a small section of their body with a wide band. While they may be plentiful in your garden, they are not ideal for your earthworm farming venture.
The Native Nightcrawler

Image by sarahharding from Pixabay
This is yet another earthworm species that is not ideal for your farm. It is a slow breeder and isn’t comfortable with a disturbed environment. It’s a rather fussy worm that needs to be left alone.
The African Nightcrawler

It is a close relative to the native nightcrawler. Just like the native nightcrawler, it is a slow breeder and not worth keeping.
The red worms

Image by Blickwinkler from Pixabay
They are the most sought for earthworms by worm farmers and fishers and are commonly known as manure worms. There are two types of these worms, and Lumbricus Rubellis is the earthworm you want for your worm farm. The red worm has the capability of consuming large amounts of disposable organic garbage, reproduces quickly, and doesn’t mind a disturbed habitat.
Red worms are not large, and adults only get to about three inches in size. They are easily distinguishable from other worms such as the African nightcrawler that has an average length of five inches. Red worms can reproduce as fast as every seven days.
The slower breeds of earthworms will reproduce one in two years, while the red worm will mature in nine months and can start mating as early as two months. It has a lifespan of 15 years. With this in mind, the red worm is the species you want in your garden. What’s best, these little wrigglers are popular with fishers, which is a venture you can use to maximize your profits.
What you need
Here are a few things you’ll need to get started on how to make a worm farm.
Worms
Eisenia Fetida (red wrigglers) and Lumbricus Rubellus (red worms) are the most common type of worms for worm vermiculture. These worms are normally sold by the pound at bait shops or your local gardening center. You won’t need a lot to learn how to make a worm farm. A pound of these little wrigglers is equivalent to 1,000 worms. Red worms reproduce like crazy and will eventually regulate their numbers depending on the amount of food available for them.
Plastic bins
Plastic bins are the most ideal for a worm farm setup, ensure it has a snap on lid. The box needs to be at least 12 inches deep. Also, ensure they are opaque. Worms like it when it is dark. Use two bins for this setup.
Drill
A drill will be essential for this task. It will be used to make holes into the box.
A flower pot or brick
It is essential for the draining of your worm farm. A flower pot or brick will be placed at the bottom of the bin to regulate drainage.
Household waste or newspaper
They will be ideal for the preparation of the earthworm bed. Corrugated cardboard also works great, so do dry leaves.
Setting up Your Worm Farm
Setting up a worm farm is easy and practical, the following are basic steps to set up the ideal worm farm.
1
Mark out the holes
Using a marker or pencil, mark a series of holes on all four sides of the top of your bin. You will also need to mark our about 20 holes at the bottom of the bin. Leave the other bin blank. Take another lid and mark enough holes so that it gets some air to exchange.
2
Drill out the holes
For your bin lid and side use a 3/32-inch drill bit. For your bottom holes, use a larger 3/16 drill bit.
3
Stacking your bins
Stack one bin on top of the other. Place a flowerpot or a brick in your undrilled bin on top. It will give an allowance for the liquid to drain out of the top bin into the one below.
4
Preparing your bedding
According to experts, your bedding material is just like browns in garden compost. Using shredded newspaper will work perfectly, and so will torn-up corrugated cardboard. Using dried leaves is also possible. However, you need to avoid anything with glossy colored printing or leaves that have a strong scent or a lot of volatile oil. Once you have your bedding set, wet it down until it has the consistency of a wet sponge. It needs to be moist and fluffy.
5
Lay your worm food
Table scraps work best, and pretty much any compostable organic matter can go in your worm farm.
6
Add your worms
Once your bin is ready, place a small number of food scraps and let your worms loose on it. You will notice that the worms will naturally go for the dark. They will bury themselves in your household scraps. Don’t panic when they do this; they can’t get their way out of your bin and escape.
7
Tuck them in
To avoid getting a fruit fly infestation or worm escapees, take a few sheets of wet newspaper and lay them flat on your bedding. You could also take a few more sheets and roll them up on top. Make sure you tuck them around the corners, forming a seal, to ensure that everything is in place and your precious worms are safe.
7
Put your worms to work
Don’t lift your hopes high in the first few weeks. During this time, they are getting over the trauma of their new home. Once they are up for it, they will consume half their body weight in a single day. Therefore, if you are keeping one pound of worms, ensure that you are adding just about one pound of scraps each day.
Don’t worry if the scraps are too little or high — just make sure that you add a variety of food scraps. There is no limit to feeding them. You could feed them as frequently as every two weeks or every few days. Just keep watch of the food that is disappearing and replace it frequently. Some foods will disappear more quickly than other. Ripe fruits will break down faster, while cabbage and root veggies will take what seems like forever.
Bury your food scraps underneath the bedding to prevent bad smells. Also, vary the location of the food throughout your box.
8
Harvest your worm compost
Once your worms have completed their task, you will notice vermicompost in your bin. It is dark brown and resembles coffee grounds. The best way to get some without using fancy machinery is to lure the worms into another section of the bin. Use fresh food. In a few days, most of the worms will be working in a new area, and you can carefully scoop the ready compost.
It’s fine if you get a few worms hanging around. Just ensure that you leave most of them in the bin to continue working. Also, you could detach the top bin and pour out the liquid gathered in the bottom bin. This liquid, which is called “worm tea,” is like an energy drink for your garden plants. Dilute it and use it in your houseplants.
Maintaining and Caring for Your Worms
For best results, leave your worms alone for the majority of the time. They don’t fancy being disturbed. Feeding your worms once or twice in a week is enough. However, you need to keep it in your mind that the longer you have the worms, the more food they will need. Therefore, over time, you will add the amount of food but avoid overfeeding. If you notice that food is rotting before the worms eat it, you should examine and cut down on how much you are feeding them.
Always make sure there is enough moisture in your bin, without necessarily getting it too wet. Earthworms breathe through their skins and will need moisture for survival. If your soil is too wet, you will end up with carbon dioxide that will kill them.
You also need to ensure that your compost is not too acidic or alkaline. Your worms will do better when the pH of your soil is between 6.8 and 7.2. These levels help your worms digest their food better. Every three weeks, turn the contents of your bin over to aerate your soil.
To ensure that there is enough moisture in and to keep out the light, you can use a piece of burlap placing it on top of the worm bins or container. Carpet underlay is also ideal. Doing this will not only help in insulating your soil, but it will also protect it against extreme temperatures. You need to note that your earthworms will need warm soil. Therefore, ensure your worm farm is 60.8°F to 77°F.
What not to feed your earthworms
In learning how to make a worm farm, avoid feeding them the following foods.
Its recommended that you do not feed your earthworms with rotten food, garlic, fish, tobacco, or pet or human manure. Using too much fat will prevent your earthworms from properly breathing.
Avoid using watermelons skins since they don’t have any nutritional value for your earthworms, and they also disrupt the moisture level of your compost. In case you have used weed killer on your lawn, avoid feeding these clippings to your worms.
Using worm casting
Once your top bin of the worm farm is filled, you can empty the bottom. The emptied contents are full of useful worm castings and the best fertilizer you can get. Worm casting is worm poo and is found in the layers where your worms lived (middle and upper layers).
Both worm casting and worm tea are rich in minerals such as nitrogen, potassium, carbon, phosphorus, and microbial critters. Your worm castings can be mixed with soil to enrich it. You could sprinkle it around your garden or scratch it into topsoil.
Worm tea, on the other hand, is retrieved from the bottom bin as is as beneficial as worm casting if not better. With all the same nutrients as worm casting, worm tea contains an abundance of nutrients that can be used directly through the soil into your root system of plants. Worm tea can be collected weekly and diluted with water to create a weak tea.
The Basics of How to Make a Worm Farm
Remember, your worm farm processes less food than a compost bin, so make sure you are not overfeeding your worms. Uneaten food will attract pests. Also, cut the food you feed your worms into small pieces, as this makes it a whole lot easier for worms to consume.
As explained, the worm will feed on approximately its body weight of food each day. Meaning, you can only feed your earthworms a few handfuls each time. Once you are sure that your worms are breeding, try feeding them more food. Happy gardening!


